Friday, 20 March 2015

Thursday, 26 February 2015
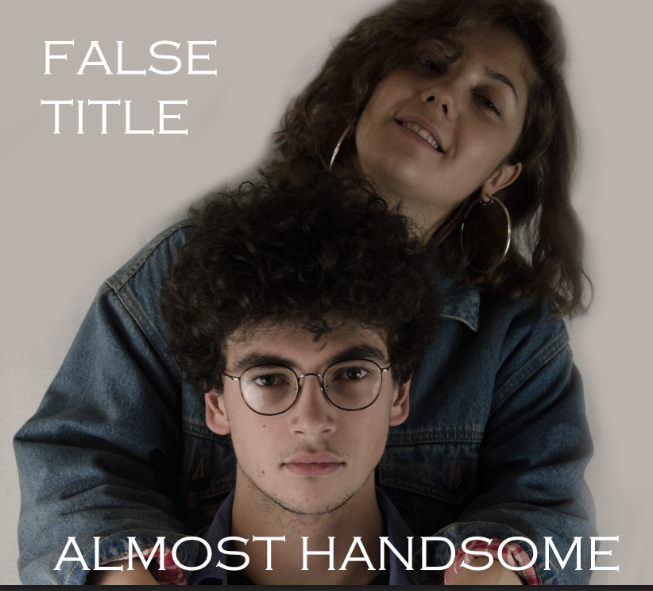
Evaluation task 1: In what ways does your media product use, develop or challenge forms and conventions of real media products?
Unfortunately, due to the browser I am using I am unable to upload the powerpoint so I had to save each slide as a JPEG.


Wednesday, 25 February 2015
Evaluation task 3: What have you learned from your audience feedback?
To show what I have learned from audience feedback I created a prezi shown above, and then below is the video of me presenting.
Friday, 16 January 2015
Evaluation Task 4: How did you use media technologies in the construction and research, planning and evaluation stages?
To create the whole concept of our media A level, we created a digipak, a website and a video. In each of these 3 concepts we used different media technologies.
First of all I took the photos on a Nikon D700 in the photography studio using both the infinity sheets and the light table for the overlay of our glitter which we wanted on our CD panel in the background. I made sure the lighting was accurate to make the photographs look more professional. By using a digital camera it makes the process easier as I can instantly look back at the photos and take as many as I need to. Being able to use my digital camera I can zoom in as I have a zoom lens therefore I can get different length shots.


LIGHTROOM
We did two shoots as the first shoot which is shown below in the editing didn't match the video. These are the photos uploaded into lightroom.

IPHONE
We used iPhones to contact each other and keep each other in the loop with what one another has done. We also exchanged messages with the band and this enabled us to be much more organised and relaxed when we were together as we all knew what was going on. By keeping each other in the loop it gave us a platform to keep in contact with some of the group members who would go off campus to shoot.
Once we had filmed our animatic prototype (explained below) we did a focus group in which we used the voice recorder on the phone to record the whole session so we had every bit of feedback that we could get instead of writing it down. This was very useful as we didn't have to remember anything we could just listen back and get the accurate answers.


THE VIDEO - PRACTICAL
On the day of the shoot we used a sony FS100 which is a different camera than we did for shooting our animatic. We did this because the NX5 is a zoom lens camera and we wanted to use a prime lens as this gave us a better quality image. By using the FS100 we had to measure the length of the shot from the lens to the main focus of the video however we did not mind as this gave us a perfect image. This camera was very good and helped us create an aesthetically pleasing image.
For our video we used lots of different shots. In the first strand it was simple and the camera was just in front of the band whilst they performed however the second strand involved a crane to create an aerial shot, we wouldn't have been able to shoot this strand without the crane as the camera needed to be up very high above her. This created and arch when moving up and down therefore we had to place the girl very careful so when the camera came down her face would be level with the camera.
EDITING

The software we used for editing was Adobe Premier. This software was professional and offered us what we wanted to edit our video it was just a case of finding the tool we needed.
Cutting - This is essentially what editing is, cutting the track together. I had practiced this in iMovie when I editing our animatic prototype therefore I had an understanding of what the editing consisted of. To cut the shot you drag the end of the clip to the part where you want the shot to end and you do the same or the beginning. I learnt that it is very important to cut on the beat as it is more satisfying for the viewer and also means that the shots of the video fit with the track.
Opacity - We played with the opacity of some of the shots to layer them over the previous shot to fit with the tone of the video. This allowed us to use slow transitions matching with the speed of the song instead of using simple cuts which made the video look jumpy and was uncomfortable to watch.


DIGIPAK
To create the digipak I mainly used photoshop, but I also used lightroom to edit the photos and then took them into photoshop to edit further and create the sides of the digipak. I did the front panel first and experimented in photoshop with the colour and design of the panel.  |
| glitter for layering |
 |
| light table |
LIGHTROOM
Once I uploaded these photos into lightroom I rated them using stars to lower the choice making it easier for my group to choose what photos we wanted.

 As shown below I wanted to see the options we had when creating the digipak and not just use a simple black and white image at the beginning which we did end up doing. To do this I played around with the hue and saturation, clarity and brightness in photoshop. This also allowed me to edit small parts using the lassoo tool, the paintbrush and the brightness of the photograph. This was quick and easy therefore it would've been foolish not to have experimented with these tools.
Examples of ideas:


I also looked at different textures that I could layer in photoshop to see if a grainy effect made the image more exciting or just made it look dirty. I did this by changing the opacity of the textured layer in order to allow the behind image of the band to seep through.


 I created a new layer in photoshop and then took the opacity of the texture layer down in order for the grainy effect to come through. However, we felt that this made it look dated and didn't really fit with the idea of our band.
I was going for a vintage distressed look like Amy McDonalds album cover.
The textures I used which created these images but we decided not to use any of these as they did not fit:


At first we used this graphic design and the put the above photo in to add colour and atmosphere however we designed it and it didn't fit the tonality of the band. Therefore, when we took the photos of the band I edited in photoshop and lightroom like above ^ and used that as the homepage.


THE VIDEO - PLANNING
Before the actual filming of the video we used softwares on the internet such as prezi.
PREZI
This was really helpful as it was another way of looking at planning, we are used to using Microsoft powerpoint therefore using press allowed us to set things out in a different way and share the prezi so everyone can view it. I used the first prezi to look in to music industry before I started the planning for our music video.This allowed me to understand what I was reaching for and what I needed to research to create the final product. The next prezi I made for the band that we will be using in our video therefore I explored different aspects of the band and looked at other bands and their target audience.
PHOTOSHOP
 |
| BEFORE |
 |
| TOOL |
 |
| THROUGHOUT |
 |
| EDITED |
Examples of ideas:
I also looked at different textures that I could layer in photoshop to see if a grainy effect made the image more exciting or just made it look dirty. I did this by changing the opacity of the textured layer in order to allow the behind image of the band to seep through.
I created a new layer in photoshop and then took the opacity of the texture layer down in order for the grainy effect to come through. However, we felt that this made it look dated and didn't really fit with the idea of our band. I was going for a vintage distressed look like Amy McDonalds album cover.
The textures I used which created these images but we decided not to use any of these as they did not fit:


Final Digipak:
WEBSITE
We used WIX to create our website. First of all we started on the home page and the website builder is very helpful as it gives you a lot of choice for graphic design. You can add your own photos and then add effects, lines and shapes.
 |
| using my own photograph |
 |
| using graphic design from WIX |
 |
| background for homepage |
Wix was a very easy website to use and this was so helpful for us as none of us are professional website makers therefore having a guide enabled us to make the best website we could. We also used another website to create T-Shirts for our merchandise page. This was quite tedious as we had to edit the text as we wanted an image inside the text however in the end we corrected this.
We also created social media sites for our band. This allowed us to create more of an identity for the band. It gives the band a way to connect with their fans on a personal level. The main thing a new band wants is exposure therefore they can post their video on twitter with a link so more people click on it and therefore there is exposure.
THE VIDEO - PLANNING
Before the actual filming of the video we used softwares on the internet such as prezi.
PREZI
This was really helpful as it was another way of looking at planning, we are used to using Microsoft powerpoint therefore using press allowed us to set things out in a different way and share the prezi so everyone can view it. I used the first prezi to look in to music industry before I started the planning for our music video.This allowed me to understand what I was reaching for and what I needed to research to create the final product. The next prezi I made for the band that we will be using in our video therefore I explored different aspects of the band and looked at other bands and their target audience.
IPHONE
We used iPhones to contact each other and keep each other in the loop with what one another has done. We also exchanged messages with the band and this enabled us to be much more organised and relaxed when we were together as we all knew what was going on. By keeping each other in the loop it gave us a platform to keep in contact with some of the group members who would go off campus to shoot.
Once we had filmed our animatic prototype (explained below) we did a focus group in which we used the voice recorder on the phone to record the whole session so we had every bit of feedback that we could get instead of writing it down. This was very useful as we didn't have to remember anything we could just listen back and get the accurate answers.
 |
| text message |
 |
| voice recorder |
 |
| voice recorder |
SONY NX5 CAMERA / filming animatic
We used this camera to film our animatic, we wanted to use a professional camera over an iPhone as it gave us a more professional feel to the video and it was much more accurate and gave us a good quality image. We filmed as many strands as we could in the space of time we had with the people that were available but it actually allowed us to get a good idea of what will actually be in front of the screen and see if everything fitted together.
We also used professional lighting in our animatic as this was more realistic and gave us a better understanding of what it will look like on the day.
MACBOOK PRO - iMovie / filming animatic
Once the video was filmed we transferred the footage from the camera to my laptop. We used iMovie to edit, this software is very easy to use and allowed us to see all the footage together to decide what worked and what didn't. Once Franchi and I had edited on my laptop we watched the animatic back and realised that the lighting (blue and yellow) didn't work together therefore we changed the yellow to black and white. We also decided that there needed to be more to the video, it was quite simple and boring therefore by using iMovie we could see what we were lacking in. However, this prototype did give us a very accurate view of what our final product will look like, using this software allowed us to view most strands of the video such as the content, the sound, the lighting and the overall view of the video. We thought it was better to actually create a video that was a clear representation of the video we wanted to create than do a storyboard.
The animatic create from the sony NX5 and iMovie:
THE VIDEO - PRACTICAL
On the day of the shoot we used a sony FS100 which is a different camera than we did for shooting our animatic. We did this because the NX5 is a zoom lens camera and we wanted to use a prime lens as this gave us a better quality image. By using the FS100 we had to measure the length of the shot from the lens to the main focus of the video however we did not mind as this gave us a perfect image. This camera was very good and helped us create an aesthetically pleasing image.
 |
| LEFT: Sony NX5 RIGHT:Sony FS100 |
 |
| measuring the length of the shot |
 |
| crane |
 |
| tracking with glitter |
The third strand of the video we used a track which has to be laid down and then the camera was attached to the tracker and I got pushed whilst I filmed this strand, this changed the angle of the shot in the same shot so we circled the band. Tracking allows you to move around the band smoothly, it suits the style of the song as our track is very slow. When filming this there was flitter falling from above (we used a cherry picked to do this and a fan). We wanted to glitter falling in slow motion but the band singing and playing normal time therefore we had to over crank the song to achieve this slow motion in the lip-sync. Over crank means speeding up the track, I sent this to the band so they could rehearse prior to the day so they could practice. This was very effective and although it was hard to sync in post production it was a very effective technique.
Below is a few seconds of what the tracking does, due to the editing there isn't a clear shot of the tracking going on for a long time however below shows how we used it.
Below is a few seconds of what the tracking does, due to the editing there isn't a clear shot of the tracking going on for a long time however below shows how we used it.
EDITING
The software we used for editing was Adobe Premier. This software was professional and offered us what we wanted to edit our video it was just a case of finding the tool we needed.
Cutting - This is essentially what editing is, cutting the track together. I had practiced this in iMovie when I editing our animatic prototype therefore I had an understanding of what the editing consisted of. To cut the shot you drag the end of the clip to the part where you want the shot to end and you do the same or the beginning. I learnt that it is very important to cut on the beat as it is more satisfying for the viewer and also means that the shots of the video fit with the track.
Opacity - We played with the opacity of some of the shots to layer them over the previous shot to fit with the tone of the video. This allowed us to use slow transitions matching with the speed of the song instead of using simple cuts which made the video look jumpy and was uncomfortable to watch.
Colour grading - we wanted to edit the track into black and white as we did not like the lighting of the track and when we did got target audience feedback everyone said that they preferred the black and white aspect of the video. The white skin is very exposed so it looks more like a block colour and the black in the video is very black so there is a clear contrast which creates a dramatic feel to the image.
Layout - We decided to use the 'letterbox' layout as this adds to the classic look of our video. The letterbox design is very classic like a cinema.
Base Track - We used a base track over the video as this gave the best quality clear sound we could get for our video. To do this you find a time on the clapper board (on the iPad) and match it with the time in the video, when the exact milliseconds match up then you have perfect lip sync. By doing this it made the editing process very effective as we didn't have to match up each shot with the time of the base track. This also gave us more time to experiment as we didn't have to worry about messing up the timing of the track.
SHARING THE VIDEO
 |
| sharing the video to Facebook |
Youtube was the main platform for sharing our video. We uploaded our finished product to youtube and then we all shared this onto different social media sites such as twitter and Facebook to get people to see our video.
 |
| video on youtube |
Subscribe to:
Comments (Atom)